 Apple has garnered a large following of loyal fans due to its strong brand reputation and quality assurance. However, when unboxing a new iPhone, if you also switch to a new SIM card or want to switch to another new Apple ID, this can be a time-consuming process.
But don’t worry, this passage will tell you how to easily create a new Apple ID and transfer data from one account to another easily.
How to transfer everything from one Apple ID to another
From this part, you can know how to create Apple ID and transfer data efficiently.
• Section 1 – Create a new Apple ID during the setup
Step 1 – Tap on Forgot password or don’t have an Apple ID?, then choose Create a Free Apple ID to continue.
Step 2 – Choose your birthday information and key in your name > Click Next.
Step 3 – Choose Use your current email address or Get a free iCloud email address.
Step 4 – Just follow the onscreen guidance to check your private information and set up two-factor authentication. Then you can successfully own a new Apple ID.
• Section 2 – How to transfer everything between different Apple IDs
How to transfer data from one apple ID to another completely when they are using different Apple IDs? Apple doesn’t offer a direct way to finish the process. So you may need to rely on a third-party tool to make it.
When it comes to making an iPhone-to-iPhone data transfer task, the professional transfer software – FoneTool will be your ideal choice.
Fast transfer speed: You can easily transfer GBs of iPhone data to another iPhone within minutes.
Simple operation: The easy-to-use interface lets all transfer tasks can be finished in a few clicks.
No data loss: Total USB connection ensures all your data are moved in an absolutely safe environment and can avoid sudden data leakage.
Wide compatibility: All iPhone models and iOS versions can be supported, including the latest ones, as well as iPad and iPod Touch.
Now you can continue reading to get how to accomplish the task within a few clicks.
Step – Run FoneTool on your PC > Connect both of your devices to the computer with two USB cables > If asked, click Trust on your iPhone to continue.
Notes:
1. This operation will clear all current data on your target iPhone, so you would better to use FoneTool to back up your vital data first to avoid data loss. (Go to Phone Backup > Choose Selective Backup).
2. If there is only one USB cable, you can also use the Phone Backup feature to finish the data transfer: Select the Full Backup option under the Phone Backup interface to back up source iPhone first > Then unplug it and plug the new iPhone > Go to My Backups to restore the backup. The restoring process will also overwrite all existed data on your new iPhone.
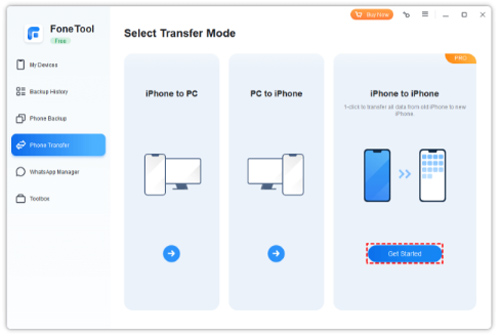
Step 2 – Select Phone Transfer > Go to iPhone to iPhone and tap on Get Started.
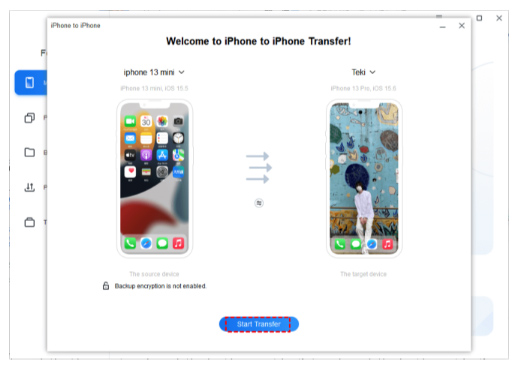
Step 3 – Confirm your source device and target device > Enable backup encryption if you need > Click Start Transfer to begin.
How to selectively transfer data from iPhone to iPhone
The professional iPhone transfer software – FoneTool can also help you selectively transfer photos, videos, music and contacts between different iPhones.
Step 1 – Launch FoneTool > Connect your source iPhone to the Windows PC.
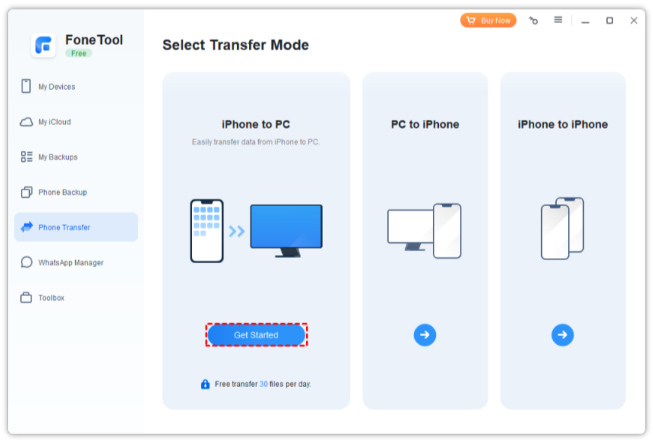
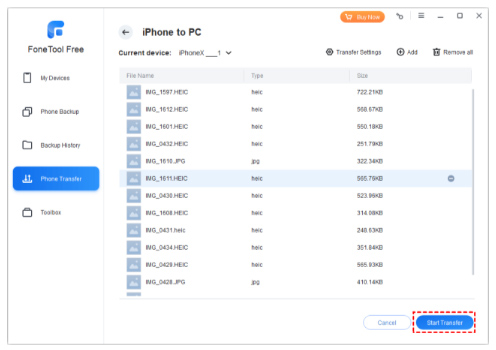
Step 2 – Click Phone Transfer > Choose iPhone to PC and tap on Get Started to continue.
Step 3 – Click each icon you need to preview and select the targeted data > Change the storage location from the Transfer Settings to save data as you like > Click Start Transfer to begin.
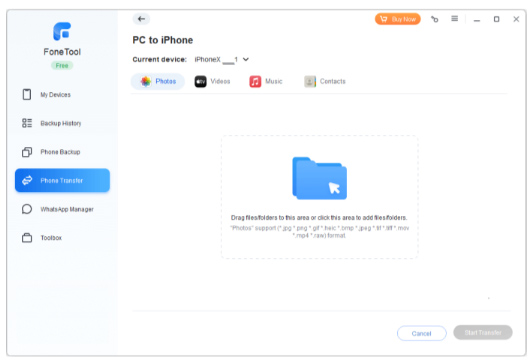
Step 4 – Once the transfer is finished, you can plug your another iPhone to the computer > Go to Phone Transfer > Choose PC to iPhone to move data to your new device.
Conclusion
Now you can know how to create a new Apple ID and transfer everything from one Apple ID to another. And FoneTool will be the best choice to make it. If need, it can also help you selectively transfer data from iPhone to iPhone.
This product, loved by over 3 million users, will not disappoint you. Give it a try now!