 Microsoft Outlook is one of the best email clients. It requires appropriate mail servers to access the email account.
When Outlook is configured with an Exchange server profile, Offline Folder File (OST) is created on the local system, containing all the mailbox items.
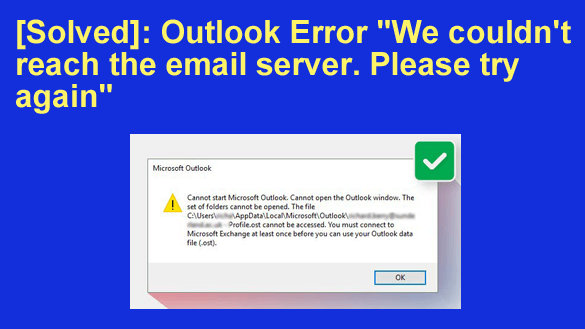
Sometimes, Outlook fails to connect to the Exchange Server mailbox and displays the error, “Couldn’t reach the email server.” Due to this, you’re not able to receive or send new emails. Below, we will discuss the causes of this error and the possible solutions to fix it.
Causes of the ‘Couldn’t reach the email server’ Error in Outlook
Outlook may stop connecting to Exchange Server due to multiple reasons. Some of them include:
· Synchronization issues with OST files
· Network connectivity issues
· Damaged or inaccessible OST files
· Corrupt Outlook profile
· Incorrect Outlook credentials
· Faulty or incompatible add-ins
· Outlook configuration issues
· System/Server firewall issues
· Damaged Outlook program files
Methods to Fix “We could not reach the email server” Error
The following methods can help you to resolve the issue and connect to the server. These methods work well for Outlook 2007, 2010, 2013, 2016, and 2019.
Method 1 – Check Your Internet Connection
If Outlook cannot connect to the server, this can be because of your internet connection. You can try to reboot your router, restart the system, or contact your service provider to restore your internet connection. Also, you can try using a private network instead of a public one.
Method 2 – Check Your Credentials
You might misspell your username or password at the time of setting up the Outlook profile or use the wrong credentials. So, check if the credentials you are using are correct by following the steps below:
1 – Open Outlook.
2 – Go to File > Info > Account Settings > Account Settings to open the Settings window.
3 – Go to the Email tab and select your Outlook account.
4 – Check for the Remove option in the top panel and remove the account.
5 – Go to the home page and log in again with the right credentials.
Method 3 – Launch Outlook in Safe Mode and Disable Add-ins
Outlook allows you to extend the functions of the application with the help of add-ins. But when these add-ins do not work properly, they cause various issues within the Outlook application. In this case, you can open Outlook in safe mode and disable the add-ins. Here are steps:
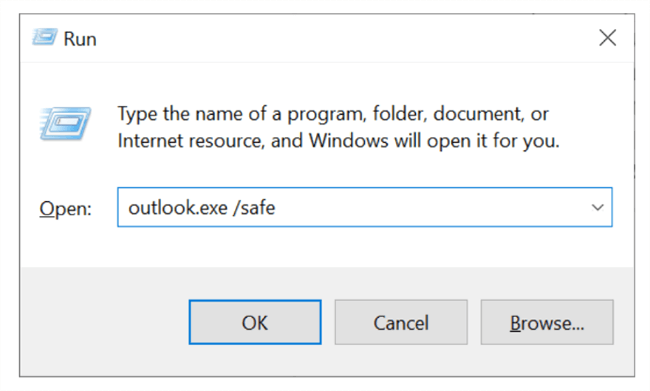
1 – Press Windows+R to open the Run dialog box.
2 – Type outlook.exe /safe to open Outlook in safe mode.

3 – Check if Outlook can connect to the email server in safe mode. If it connects properly, the add-ins are most likely causing the issue.
4 – Close Outlook and re-open it in normal mode.
5 – Select File > Options.
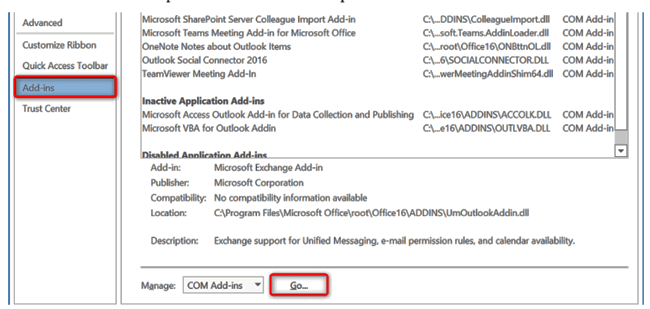
6 – Click the Add-ins option in the left-side panel and select the Go button.

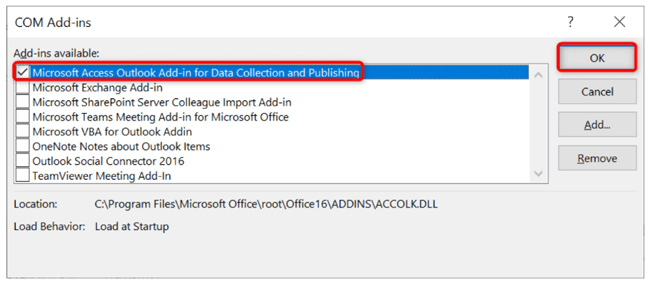
7 – Uncheck the add-ins, except “Microsoft Access Outlook Add-in for Data Collection and Publishing” and click OK.

8 – Enable one add-in at a time to identify the problematic add-in.
9 – Once found, remove that add-in by selecting it from the list and clicking on the Remove option.
Method 4 – Disable Offline Mode
If you see the message “Disconnected” or “Working Offline,” it clarifies that Outlook is not connected to the server. Here, it is necessary to switch from offline to online mode. Follow the below steps to switch to online mode:
1 – Open Outlook.
2 – Navigate to Send/Receive tab.
3 – Select the Work Offline option to reconnect to the online server.

Method 5 – Create a New Outlook Profile
If your existing Outlook profile gets damaged, you may face various issues, including the server connection error. In this case, creating a new Outlook profile can help in fixing the error. Follow the below-mentioned steps to create a new Outlook profile.:
1 – Open Control Panel and click on the Mail option.
2 – Click Show Profiles and click Add.
3 – Enter the profile name and click OK.
4 – Configure the new profile with the email account and click Finish.
Method 6 – Recreate OST File
If the above methods do not work for you, recreating the Outlook data file (OST) can help you fix the error.
The default location of the OST file is: \Users\UserName\AppDataLocal\Microsoft\Outlook\. The location of the file may vary based on the Outlook version.
To recreate the OST file, you can move it to another location or rename it with the .bak or .old extension and then delete it. After that, restart Outlook and it will automatically create a new OST file and synchronize the mail items from the server if the mailbox server is still active.
But if the OST file is not recreated, it means the mailbox or profile is deleted or disabled. In such cases, you can convert your orphaned offline OST file to PST format using an advanced OST to PST converter tool, such as Stellar Converter for OST. Then, import the PST file into your Outlook account to restore your mailbox items.

Conclusion
There are various methods to resolve the Outlook error, “We could not reach the email server. Please try again.” You can try these methods to resolve the error.
If your Outlook data file (OST) is damaged or corrupted and causing the issue, then you can recreate it after taking the backup. If you found any missing items in the new OST file, then convert the backup OST file to PST using Stellar Converter for OST.
Then, import this PST file into your account using the Import and Export wizard in Outlook to restore the missing items.