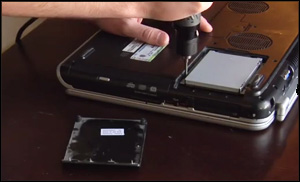
 I have written several posts that discuss either replacing a bad laptop hard drive with a new one or upgrading the system with a larger drive or an SSD.
Last night I was answering a reader’s question about a hard drive upgrade when it occurred to me that I’ve never really explained how to physically swap out the drives.
Replacing the hard drive in most laptops is almost as easy as selling popcorn in a movie theater. Just follow the simple steps listed below:
Important: Replacing a laptop hard drive typically requires removing several tiny Phillips head screws. These screws are very easy to lose, so make sure you keep up with them throughout the entire procedure. And take extra care not to drop a screw into the innards of your laptop!
My semi-standard disclaimer: Handling the internal components of any computer can potentially cause problems that can only be fixed by a qualified computer technician.
While replacing a laptop hard drive is usually a very simple and straight-forward process, things can and do go wrong on occasion. Follow the instructions below with caution – and only if you are willing to accept the risks of doing so.
Also, some laptop models must be partially disassembled in order to access and replace the hard drive. If your laptop is one of them, I strongly recommend paying a qualified service computer technician to replace the drive for you.
If you’re still up to giving it a go, lets get started…
1 – Disconnect everything that’s attached to the laptop. This includes the power adapter, all USB cables, flash drives, external monitors, external speakers and such. If it plugs into a socket of some sort, unplug it!
2 – Turn the laptop over and remove the battery.
3 – Locate the small rectangular panel that covers the hard drive bay and remove it. This typically involves removing one or more tiny Phillips head screws and then gently prying the cover out of it’s slot. Be careful not to break the cover or any other part of the laptop.
4 – Remove the tiny screws that hold the hard drive in place, then slide the drive in the direction opposite the connector. Once the drive is free of the connector, simply lift it out of the bay.
5 – If the drive is mounted in a supporting bracket, remove the screws holding the drive in the bracket, then remove the drive from the bracket.
6 – Remove the new drive from its packaging and install it by reversing steps 1-5.
That’s all there is to it. It really is a relatively simple process. If you’re more of a “show me” type of person here’s a short video showing the procedure in visual form:
There you have it. Pretty simple, right?
By the way, if you search YouTube and Google for your laptop’s brand name and model there’s a good chance that you’ll find a video for your specific laptop.
And now I must mention one caveat…
Many newer laptops and notebook computers don’t have easily accessible drive bays of the type mentioned in this post.
If your machine is one of them you’ll have to at least partially disassemble the case in order to access the drive.
You’ll likely find a YouTube video or two that shows how to replace the hard drive in your particular laptop model, but if you don’t feel comfortable attempting the job yourself you can always pay a computer tech (or even the tech-savvy teenager next door) to do it for you.
Bonus tip #1: Since you’re going to be replacing your hard drive anyway, I recommend that you consider replacing it with a super-fast solid state drive (SSD). This post explains why.
Bonus tip #2: Want to make sure you never miss one of my tips? Click here to join my Rick’s Tech Tips Facebook Group!
Want to ask Rick a tech question? Click here and send it in!
If you found this post useful, would you mind helping me out by sharing it? Just click one of the handy social media sharing buttons below.