Do you own a Sony PlayStation 4 game console?
If so, chances are you can’t install any more games because your PS4’s hard drive has run out of space.
It has always been possible to upgrade the hard drive in a PS4 with a little “minor surgery”, but now you don’t have to bother with replacing the internal drive at all.
Sony has just released a firmware update that adds external USB hard drive support to the PlayStation 4.
Once the update has been installed your PS4 will be able to use any external hard drive that has a USB 3.0 connection as long at its storage capacity is somewhere between 250GB and 8TB.
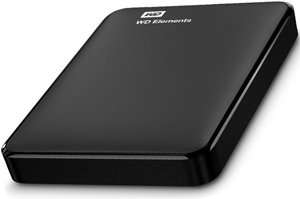
In case you’re wondering, you won’t need to buy an expensive drive to use with your PS4. In fact, a relatively cheap drive like this 2TB model (#ad) from WD will work just fine.
After you’ve purchased a drive, follow these steps to set it up:
1 – Connect the drive to an open USB port.
2 – Navigate to Settings>Devices>USB Storage Devices and select the external hard drive that you just connected to the console.
3 – Select Format as Extended Storage, then tap X.
4 – Select Next, then tap X.
5 – Select Format, then tap X.
6 – Confirm that you really want to format the drive by selecting Yes, then tap X.
7 – Select Okay, then tap X.
That’s all there is to it. Your new external USB hard drive is connected, formatted and ready to use. Any new games and apps will automatically be installed on the external drive.
And now for a bonus tip: Be sure to sign up for my free RicksDailyTips Email Newsletter at the bottom of this page!
Want to help spread the word about my tips? Just click one of the handy social media sharing buttons below: