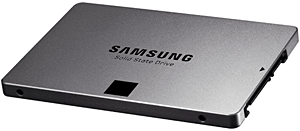
A while back I wrote a post explaining the benefits of replacing your hard drive with a Solid State Drive (aka SSD).
Of course the greatest benefit is the amazing speed increase you’ll gain by replacing your hard drive’s spinning platters and read/write heads with an SSD’s lightning-fast memory chips.
You might recall that in that post I recommended paying a PC Tech to swap out the drives for you, but since then I’ve had a couple of emails from folks who really wanted to try upgrading their laptops themselves, prompting me to decide to write this post explaining the procedure.
But before we get to that, if your laptop was made in such a way that the entire case has to be partially disassembled in order to access the hard drive, I still strongly recommend that you hire a qualified PC tech to remove the hard drive and install the SSD for you. Just sayin’.
On the other hand, if your laptop’s drive bay is easily accessible via a small removable cover you can swap out the drives out yourself. Just follow the instructions below.
But first, I must ask you to read and agree to my semi-standard disclaimer…
Please don’t follow this tutorial unless you agree that if a Tsunami wipes out your favorite Pacific Island, your car turns into a unicycle, you lose your data or your laptop gets fried, it isn’t my fault. In fact it’s nobody’s fault. Things sometimes happen, you know?
If you agree with everything that I just said, then let’s get started with step 1:
1 – Before you do anything else create a System Repair Disc and Backup Image of your current Windows installation.
Make sure everything you’re backing up to restore onto the SSD will fit on the SSD. This can be a concern because the least expensive SSDs are typically much smaller than hard drives.
If everything won’t fit onto the SSD (if in fact it has less storage space than the hard drive) you’ll need to delete some programs and/or data files (or back them up separately) in order to ensure that the restored backup files will fit onto the SSD.
Click here for instructions for creating a Backup Image with Windows 8.1. This post explains how to do it in Windows 10.
Note: If you want to make things really easy for yourself, you can purchase a handy Apricorn EZ-Upgrade Notebook Hard Drive Upgrade Kit. (#ad)
2 – Purchase an SSD (#ad) that was designed to work in your particular laptop. Most laptops can use any standard 2.5″ SATA SSD.
3 – Enter your laptop’s BIOS/UEFI settings screen and switch the hard disk mode to AHCI (if that setting can be changed).
4 – Get out the manual for your laptop and follow the instructions for removing the existing hard drive. If you don’t have a manual you can find instructions online in most cases. Just do a Google search for remove hard drive from “replace this text with your laptop brand and model number”.
Note: This post features a short video that shows how to replace a laptop’s hard drive. It just might come in handy here.
5 – Carefully insert the SSD into into the now empty hard drive bay, making sure the pins and connectors line up correctly. Don’t forget to re-install the screws if your laptop uses them to secure the drive.
6 – If you want to perform a clean installation of Windows onto the SSD you can install it from scratch using either the original Windows installation disc, recovery media or user-created Windows installation media.
However, if you simply want to clone the contents of the original drive onto the SSD you can use the System Repair Disc and Backup Image combo you created in step 1 as long as the SSD is large enough to hold all the files on the hard drive.
7 – This step is optional, but I recommend purchasing a USB external hard drive enclosure (#ad) for your old hard drive. That way you can use it as an external drive for storing your data files.
Note: If you purchased the Apricorn kit I mentioned in step 1 you already have an external USB hard drive enclosure!
That’s it! You should now be up and running with your new SSD working like a flash (notice the corny pun?) as your primary boot drive.
Bonus tip: Want to make sure you never miss one of my tips? Click here to join my Rick’s Tech Tips Facebook Group!
Want to ask Rick a tech question? Click here and send it in!
If you found this post useful, would you mind helping me out by sharing it? Just click one of the handy social media sharing buttons below.