Note: The links in this post are affiliate links.
Regular readers of this blog know that upgrading the hard drive in a notebook PC is a fairly straightforward process because I have written about it several times in the past.
Simply connect your new drive to the PC with a USB to SATA adapter cable, use disc cloning software to copy the contents of the existing drive to the new one, then remove the old drive and replace it with the new drive.
Sounds simple, right? Well, it really is pretty simple IF you’ve done it before AND you feel comfortable with the process.
But what if you aren’t all that comfortable working with computer hardware and you’re unfamiliar with disc cloning utilities?
I’ve been there, and it’s no fun crossing your fingers and holding your breath to the very end while hoping that you won’t accidentally wipe out your precious data as you attempt to transfer everything to the new drive.
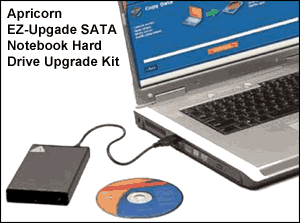
That’s why I like the Apricorn EZ-Upgrade SATA Notebook Hard Drive Upgrade Kit so much.
This kit makes it so easy to clone the contents of your old drive onto the new one, and when you’re done you can use the included external USB hard drive enclosure to convert your old drive into a USB 3.0 external hard drive!
The Apricorn EZ-Upgrade kit really lives up to its name. Here’s all you have to do to upgrade your laptop’s hard drive, step-by-step:
1 – Slide the new hard drive into the included USB external hard drive enclosure.
2 – Connect the enclosure to the laptop with the included USB 3.0 cable.
3 – Run the included EZ-Gig disc cloning utility to transfer the contents of the old hard drive to the new one.
4 – Remove the old hard drive from the PC and replace it with the new one. Your laptop’s new hard drive is now bootable, and it contains your operating system and settings as well as your programs and data. In other words, the new drive is a perfect clone of the old one (only larger, and maybe even faster).
5 – Slide the old hard drive into the external enclosure. You now have a fully functional USB 3.0 external hard drive!
The Apricorn EZ-Upgrade kit removes all the complexity and worry from the hard drive upgrade process. The kit’s step-by-step instructions lead you through the entire process from start to finish, and the EZ-Gig cloning software is easy to understand and use.
If you’re planning to replace the hard drive in your laptop/notebook computer with either a larger and faster hard drive or a super-fast SSD, you owe it to yourself to use this simple, yet effective upgrade kit from Apricorn.
Yes, you can buy and download everything you need for the job piece-by-piece (I’ve been doing it that way for years, and it works great), but there’s simply no simpler, easier or safer way than by using this awesome kit.
Click here to check out the Apricorn EZ-Upgrade SATA Notebook Hard Drive Upgrade Kit at Amazon. You’ll find lots more great info and dozens of other informative user reviews.
Bonus tip: Want to make sure you never miss one of my tips? Click here to join my Rick’s Tech Tips Facebook Group!
Want to ask Rick a tech question? Click here and send it in!
If you found this post useful, would you mind helping me out by sharing it? Just click one of the handy social media sharing buttons below.
