 The growing demand for video content like ‘how-to’ videos and tutorials have lots of folks looking for quality software they can use to record the contents of their computer screens.
This post is a brief tutorial on the ways you can record your computer screen video on PCs and laptops running both Windows and MacOS.
I’ll first explain how to do it using the machines’ in-built software and then expand on that by explaining how to use third-party tools as well.
First, let’s talk about capturing a screen video in Windows…
All desktop PCs and laptops running Windows 10 have a tool called the Game Bar.
The Game Bar’s primary purpose is to capture the screen as you play video games on your PC. However, it can come in very handy in other situations as well, including capturing video screenshots that aren’t related to gaming at all.
Therefore, you can utilize it for creating tutorial videos, ‘how-to’ videos, and other video content where it’s important to see every step of a procedure taking place on the screen.
This page has step-by-step instructions for activating the Game Bar if it isn’t already activated on your PC
Once the Game Bar has been activated you can follow the steps below to use it to record screen video:
1 – Open the Settings app and tap the Gaming tab. Next, choose the Game bar. Now toggle the Switch on the Record game clips, screenshots, and broadcasts using Game bar setting to On.
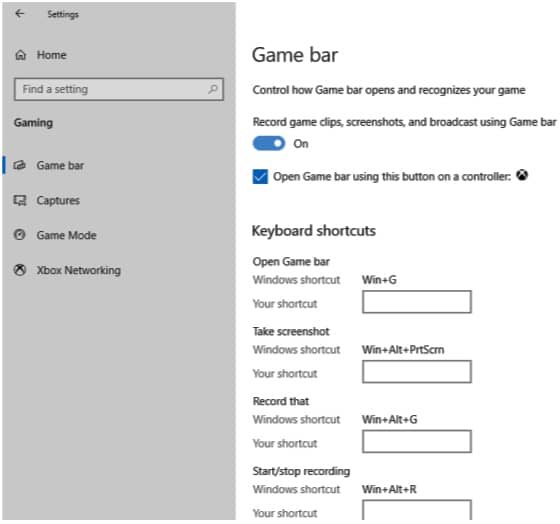
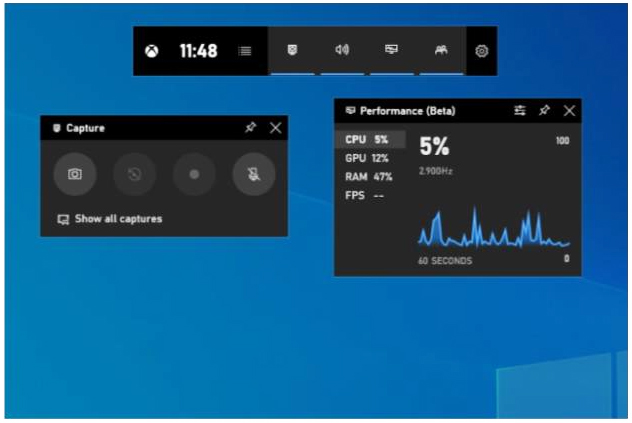
2 – Go to the screen you’d like to record and activate the app by pressing the Windows+G key combination.
You should now see a couple of widgets on the screen containing controls for recording videos, taking screenshots, etc.
You can choose whether to record a sounded or soundless video, including the option to record your voice through the microphone as well as the system sounds.
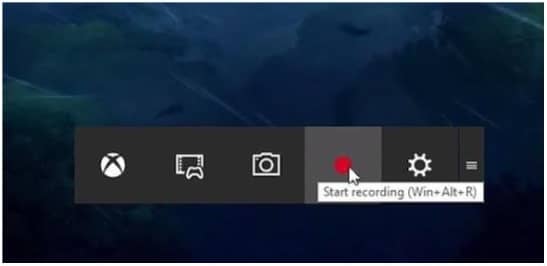
3 – Tap the Start recording icon or just press the Windows+Alt+R key combination.
From this moment on, all the activities you perform on the screen will be recorded. To hide the widgets, tap the screen.
For managing the process of making the video, use the small screen of the app at the bottom right.
To capture a screenshot and insert it in the video, use the Windows+Alt+PrtScr key combination. When you’re finished recording just click the same button you’ve used to initiate it.
4 – View the video by clicking on the notification that pops up on the screen after recording is stopped.
At this point, you can also share the video and upload it to YouTube or other social media if you wish.
Now, let’s talk about recording a video on a Mac…
As you probably know, there are several options available for recording the screen on a Mac.
This can also be done using one of two tools built-in to MacOS.
Let’s start with the Apple Screen Capture tool which allows recording either the entire screen or its separate parts. Here’s how you can use it:
1 – Press the Shift+Command+5 key combination to open the toolbar for making screenshots.
To change the screen video recording settings, use the newly opened onscreen controls.
You can select the folder to save the video, set the timer for the record to start with 5 sec., 10 sec., or no delay after activating the function.
You can also activate the microphone to record your voice or system sounds if you are going to record some kind of educational video.
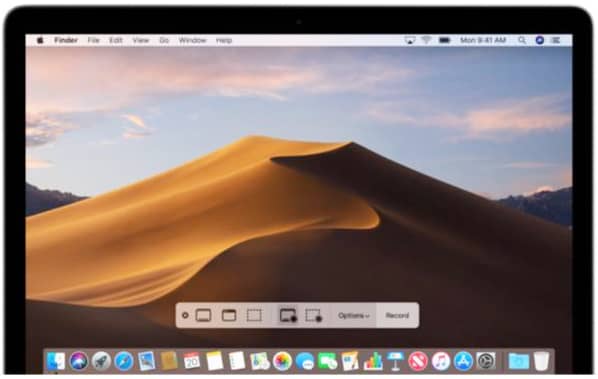
2 – Select the part of the screen you’d like to record by clicking on the corresponding icon. There’s also a possibility to apply the still screen capturing feature.
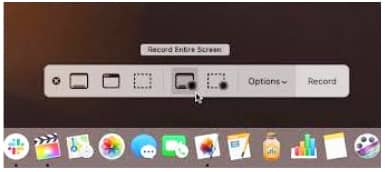
3 – If you’ve chosen to make a video of the entire screen, the cursor will change to a camera.
Now you can go to the page or app you want to shoot to activate the process, or you can use the Record button for this purpose. You’ll find it on the control panel.
For video screenshotting a certain area on the screen, drag the frame for framing the needed section. Next, tap on the Record icon.
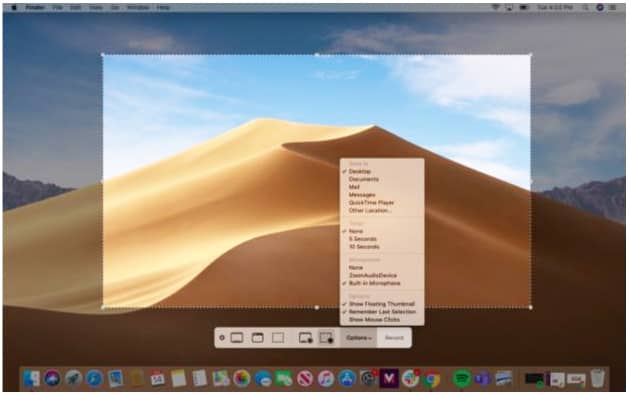
4 – When you’re done with the recording, click the Stop icon in the toolbar. Alternatively, you can use the Command+Control+Esc key combination.
5 – After the recording is stopped, a thumbnail of the video will appear in your screen bottom right corner.
If you swipe the thumbnail to the right, the video will be saved automatically.
However, if you want to trim it or share it to your social media, open the thumbnail and use the corresponding icons for doing those actions.
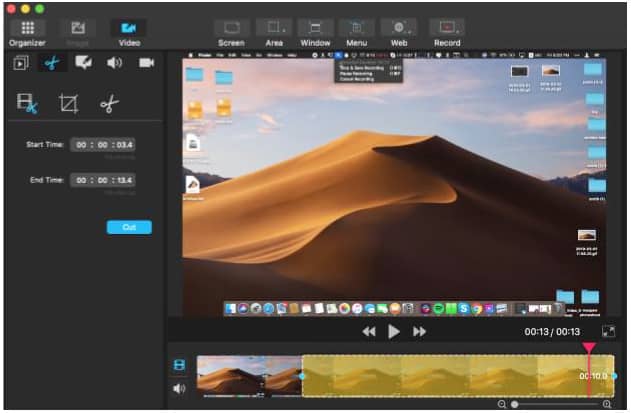
Another way you can record a video on Mac is by using Apple’s native QuickTime software. Just follow the steps listed below:
1 – Go to your Applications folder and open the QuickTime app.
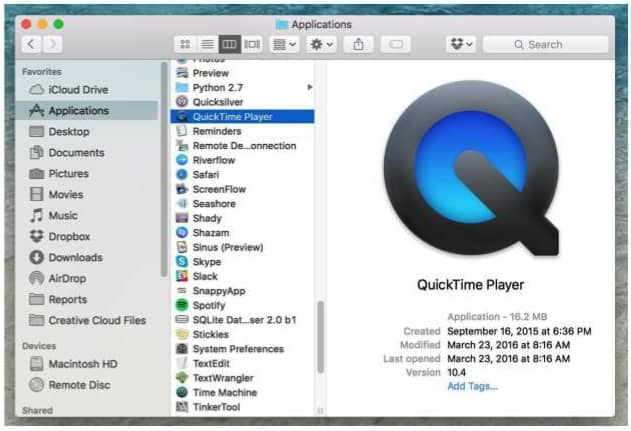
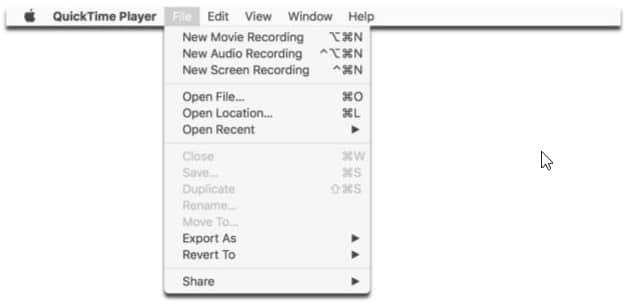
2 – Go to the File menu of the program and select New Screen Recording.
3 – Press the red dot in the middle of the app window to start recording your activities, or click and drag it to highlight the area of the screen you’d like to capture.
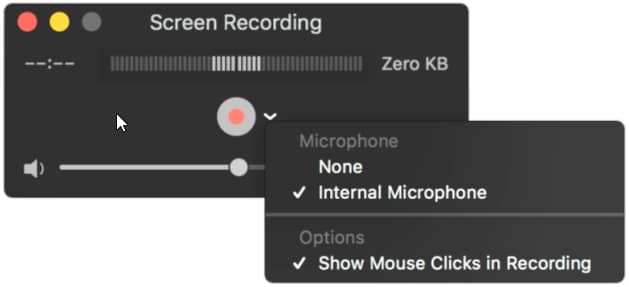
4 – In a few seconds, you’ll see the recording timer start counting. That means you’re ready to start doing the actions you want to capture.
5 – To stop recording the video click on the Stop button on the app control panel.
6 – Now save the video.
You can now share the video on your social media or delete it.
As you see, it’s all quite simple and doesn’t require any special skills. Therefore, this tool can be used even by novices who have never tried anything like this before.
Recording a Video with Other Screen-Recording Software and Online Tools?
In additions to the video screenshotting tools that came on your Windows PC or Mac for free, there exist dozens of other free and paid, downloadable and online tools that allow you to record your PC screen.
The selection of the best no watermark screen recorders is huge and finding the one you need should not be a problem.
Compared to the in-built tools, these third-party options have a much more diverse collection of features that allow you not only to record a video, but also to edit it.
The programs for recording a computer screen have the ability to shoot the entire screen or just part of it.
It’s possible to capture the screen with or without the sound.
Some apps allow covering the voice over an already shot video, which is super-convenient for people creating educational content, tutorials, and ‘how-to’ videos.
One of the main benefits of such tools is that they can be used for converting your video to a specific format that might be require in order to share it on YouTube or your social media pages.
Bottom line: You have several options available to you for capturing video recordings of your computer screen. Just choose the one that works best for, and have fun using it!
Never miss a tip! Click here to sign up for my free Daily Tech Tips Email Newsletter!