 Question from Ellen: I enjoy taking pictures and sharing them on Instagram and Facebook, and I’ve been doing that as a hobby for several years now.
Ten months ago I started a photo blog using WordPress to try to make some money from all the photos I’ve taken over the years.
The problem is I’m not getting much traffic from Google at all to my photos.
Is there something I can do to get the photos on my blog to show up in relevant Google image searches?
Rick’s answer: This problem has been afflicting beginning photo bloggers for years, Ellen.
But luckily there are several things you can do to encourage Google to send more traffic to your blog’s posts (which of course contain your photos) as well as the photos themselves via their Image Search tool.
Google’s algorithm uses the text surrounding a photo as well as other direct and indirect signals to determine what your photos are about. It then uses the information it gathered to help it decide when a given post or photo of yours matches a search query.
When one of your blog’s posts or a photo contained on it matches a search query Google will add that post and/or photo to that query’s search results listing.
The problem is many photo bloggers simply add a photo to a post without adding any type of textual information that can assist Google with the task of determining what the photo is about.
And when that happens those “bare” photo posts rarely make it into any relevant search results because Google doesn’t realize the photo is relevant to any searches.
Luckily, there are several things you can do to provide Google with all the information it needs to properly determine what your photos are depicting. And that will get them into a lot more search results listings!
First, you need to choose a filename for your photos that accurately explains what the photo is about.
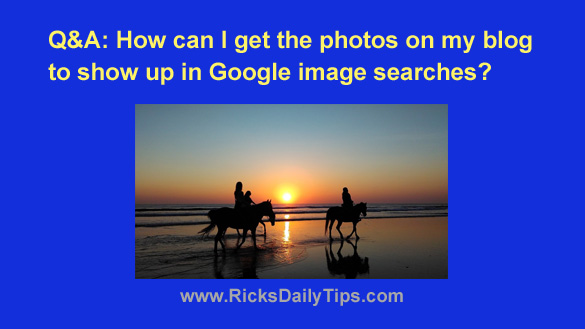
For example, let’s say you have taken photo like the one below featuring a family riding horses on the beach at Maui while the sun is setting in the background over the water:

Instead of naming the photo something like beach-sunset.jpg or maui-sunset.jpg you could name it something like this instead:
people-riding-horses-maui-beach-sunset-over-pacific.jpg
Yes, that’s a long filename, but filenames like that are very useful to Google.
Why? Because instead of showing up on page 79 for a search for the term “beach sunset” your photo and/or the post containing it could well show up near the top of the search results for queries like “beach sunset at maui“, “maui sunset over the pacific“, “people riding horses at sunset“, “people riding horses on Maui beach at sunset” and other such more detailed searches.
Those longer types of search queries are called “long tail searches”, and those are the types of descriptive searches that can send lots of traffic to your blog if your photos and posts include those words in the photo’s filenames and the surrounding text.
Another thing you can do is add extra text to the page describing what the photo is about.
Instead of simply placing a photo in a post and calling it a day, try adding a paragraph or two that describes what the photo is about or what’s happening in the photo.
For example, you could add a paragraph that reads something like this:
“I was walking on the beach at Maui enjoying the most spectacular sunset over the Pacific when this family passes by while riding a pair of horses. As you can see it made for a wonderful silhouette of them and and their horses against the setting sun.”
As you can see, that’s paragraph contains plenty of words and phrases that Google can use to determine exactly what a viewer will see when they view the photo on their screen.
But wait, there’s more…
In addition to adding descriptive text to the post surrounding the photo, you can also add extra text to the image itself!
First, you can add descriptive text to the photo in the form of an “Alt tag”. Here’s how:
1 – Upload the photo to your blog and place it wherever you want it to appear in your post.
2 – Click on the photo to display the small “Options” menu.
3 – Click on the “Pencil” icon to open the “Edit” screen.
4 – Type your descriptive text into the box labeled “Alternative Text”.
Second, you can add a caption to the photo by following these steps:
1 – Click on the photo and the “Pencil” icon again to re-open the “Edit” screen (if you’re no longer on the “Edit” screen of course).
2 – Type a descriptive sentence into the box labeled “Caption”.
Now when the post is viewed on your blog the photo will appear with the caption you assigned to it like this:

In addition to the caption, the HTML code for the photo will include basically the same text in an “Alt tag” that’s hidden from the viewer but readable by Google.
The tips mentioned above should go a long way towards getting your blog’s photos to show up in Google’s image searches. And just as important, they will help the posts containing the photos to show up in Google’s text searches as well.
It’s important to note that there are some “off page” search engine optimization (SEO) tasks you can perform (such as link building for instance) to generate additional search traffic to your photos and posts as well, but the “on-page” techniques mentioned above are where you need to start.
I hope this helps, Ellen. Good luck with your blog!
Never miss a tip! Click here to sign up for my free Daily Tech Tips Email Newsletter!