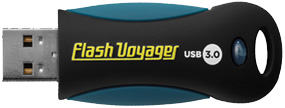
 Question from Gary M.: I have my photos and Lightroom catalog on my USB drive and move them from my laptop to desktop. It would make my life easier if it presented as the J: drive every time it’s plugged into either machine.
How can I force my external USB drive to present itself as the same drive letter every time it’s plugged in no matter which PC I plug it into?
Rick’s answer: Gary, you didn’t mention which operating system you’re using, so I’ll give instructions for both Windows 7 and Windows 8.1.
If you’re running Windows 7:
1 – Plug your external USB drive into one of your PC’s USB ports.
2 – Click the Start orb and type Disk Management into the search box.
3 – Click Create and format hard disk partitions. Windows should display the “Disk Management” window and you should see all the drives that are currently attached to the system listed in the top pane.
4 – Right-click on the USB drive and click Change Drive Letter and Paths.
5 – Click Change.
6 – Select a new drive letter from the drop-down menu (the letter J in this case), then click Ok.
7 – Click Yes when asked if you wish to continue.
8 – Click File>Exit to close the “Disk Management” window.
9 – Repeat this procedure for every PC that you plan to use this USB drive with. From now on, this USB drive should be accessible via the same drive letter on all of your PCs.
If you’re running Windows 8.1:
1 – Plug your external USB drive into one of your PC’s USB ports.
2 – Press the Windows+S key combination to open the search box, then type Disk Management into it.
3 – Click Create and format hard disk partitions. Windows should display the “Disk Management” window and you should see all the drives that are currently attached to the system listed in the top pane.
4 – Right-click on the USB drive and click Change Drive Letter and Paths.
5 – Click Change.
6 – Select a new drive letter from the drop-down menu (the letter J in this case), then click Ok.
7 – Click Yes when asked if you wish to continue.
8 – Click File>Exit to close the “Disk Management” window.
9 – Repeat this procedure for every PC that you plan to use this USB drive with. From now on, this USB drive should be accessible via the same drive letter on all of your PCs.
Do you have a tech question of your own for Rick? Click here and send it in!